Maybe you’re like us – sushi lovers who don’t always want to grab sushi from a restaurant, but who are intimidated to try making sushi at home for fear that it won’t turn out as good as the restaurant. Sound familiar? We once were in that same (sushi) boat but have since realized how simple it is to make homemade sushi – and it really does taste just as good as the restaurant!
What you’ll need:
Tools:
- Medium pot with lid
- Sushi rolling mat
- Plastic wrap
- Avocado tool
Filling Ingredients:
- Sushi rice
- Rice vinegar
- Sugar
- Salt
- Mango
- Cucumber
- Carrot
- Sushi-grade fish*
- Avocado
- Jalapeno
- Nori
- Onion Strings
- Scallion
- Sesame seeds
- Anything else you want!
Topping Ingredients:
- Mayo
- Sriracha
- Anything else you want!
*We typically omit fish in our sushi because sushi-grade fish is hard find and expensive, but when we do add it, we source tuna and salmon from The Scale Poke Bar.
The first thing you’re going to do is to prep all of your ingredients so they are ready to go when you’re making your sushi rolls. This will entail:
To make sushi rice, you’ll want to thoroughly rinse your sushi rice until the water runs clear. This will take a few minutes and you do not want to skip this step – it’s what gives sushi rice the perfect texture, not too dry but not too sticky. We use about 1 cup of dry rice to make 3 sushi rolls.
While you’re rinsing your rice, you can get a little more than an equal amount of water boiling in a pot on the stove (we use about a cup and a quarter for 1 cup of rice). Once your rice is rinsed and your water is boiling, go ahead and add the rice into the water and pop the lid on. Keep the heat on high until you see the water come to a boil again, then stir the rice a little to prevent it from sticking to the bottom of the pot before lowering the heat down to medium low.
Keep the rice covered and simmer until all of the water has been absorbed. You can check this by tipping the pot to one side to see if any water is still hanging out under the rice. This will probably take 10-15 minutes. Once the water is absorbed, take the rice off the heat but keep the lid on for another 10 minutes while the rice continues to steam.
In this 10 minutes, combine in a microwave safe dish 2 tablespoons rice vinegar, 2 teaspoons sugar, and 1/2 teaspoon salt. Microwave just until the sugar is fully dissolved into the vinegar, about 20 seconds. Stir and let cool.
After your rice has steamed, you’re going to use a fork to simultaneously fluff it and incorporate the rice vinegar mixture you made in the microwave (called zu). Be sure to keep your fork movements light and soft – you don’t want to mash or smush your rice.
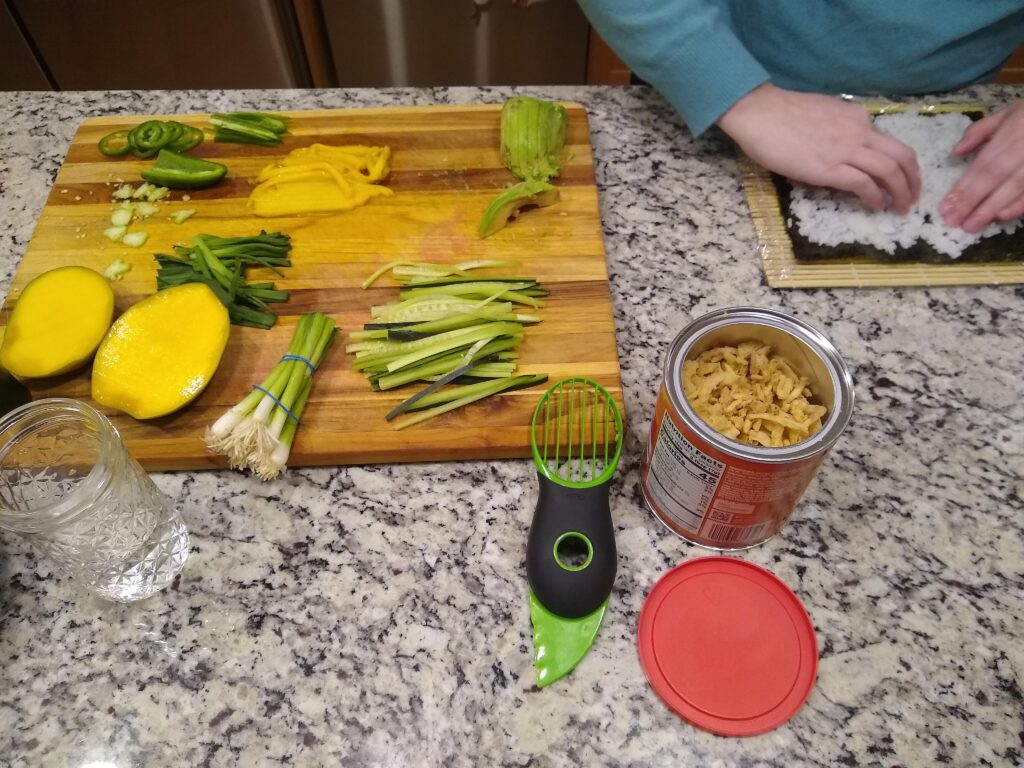
Next, you’re going to slice all of your filling ingredients into sushi-friendly shapes. This means julienne-ing your fillings (mango, avocado, jalapenos, scallions, cucumber, whatever else you’re stuffing your sushi with).
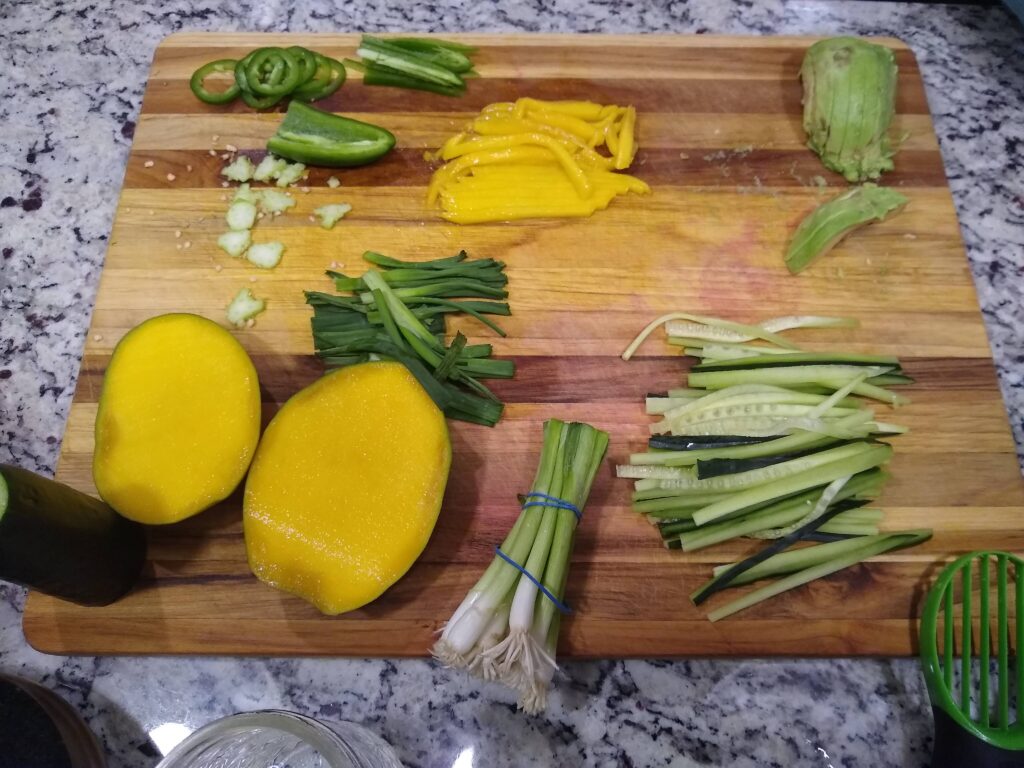
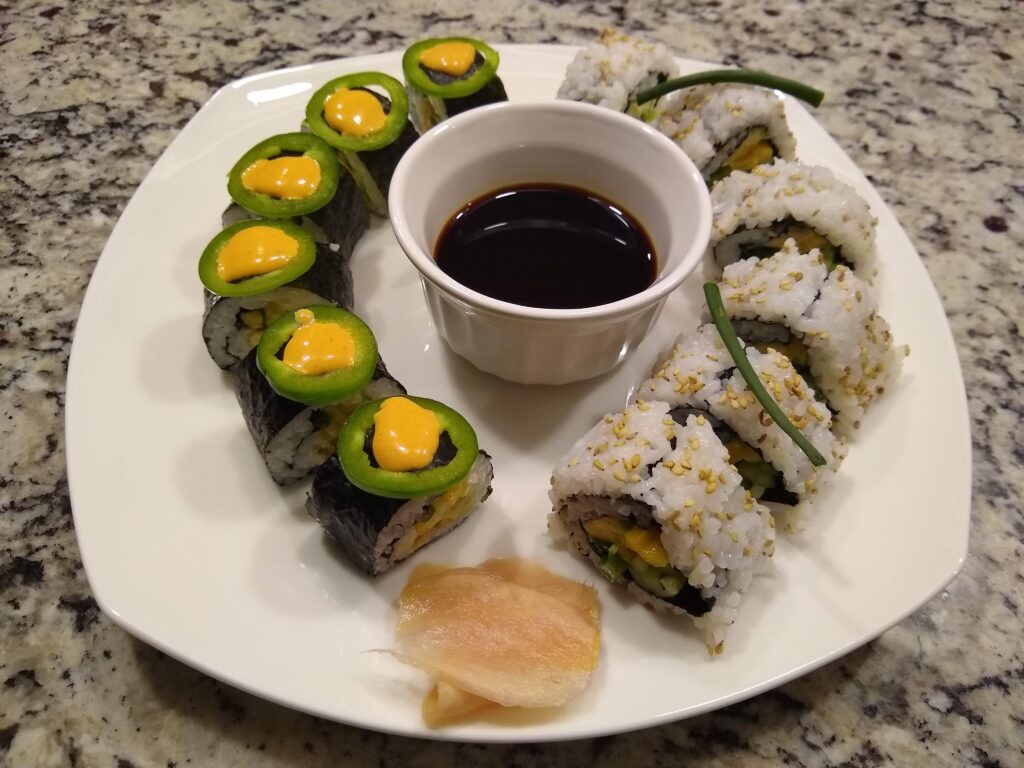
You’re also going to prepare your toppings, including mixing sauces. We chose to make a sriracha mayo by combining a 2:1 ratio of mayo to sriracha (you can adjust the ratio based on your spice tolerance). You can see in the picture above that we sliced a few rings of jalapeno for topping our sushi.
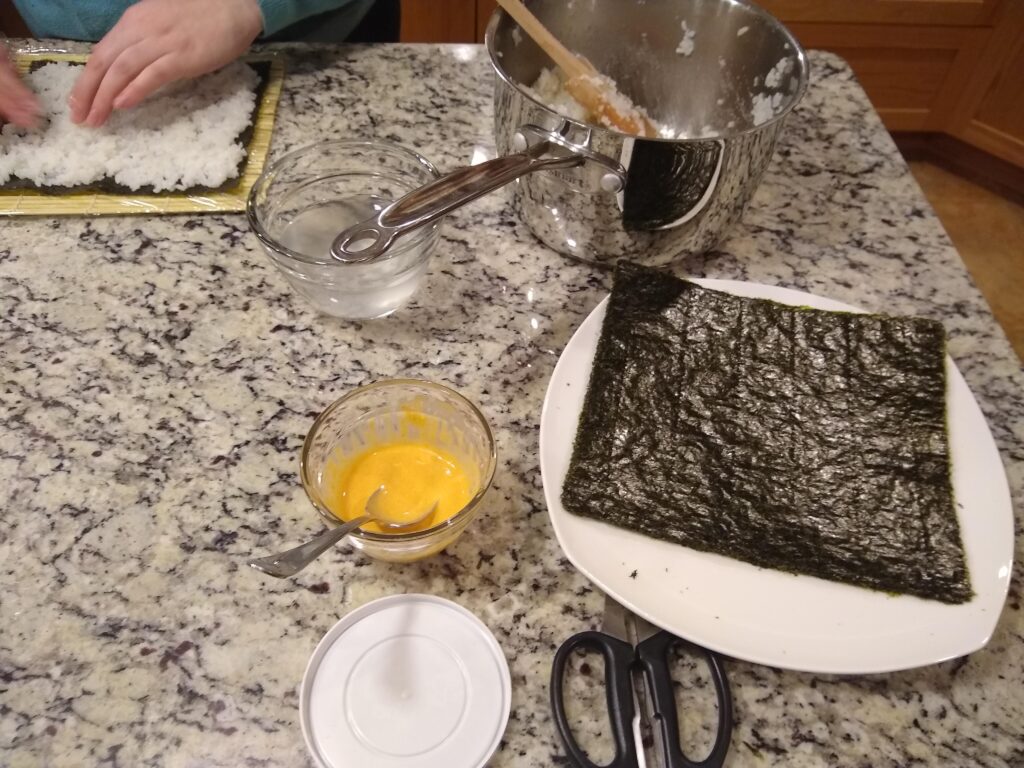
Lastly, you want to get your workstation set up. This will include a bowl of water for tipping your fingers in (prevents the rice from sticking to your hands), your sushi mat, and all of your ingredients within arms reach. For best results, we recommend wrapping your sushi mat in plastic wrap – do this by grabbing a long piece of plastic wrap, setting your sushi mat toward one end, and folding the plastic wrap over the mat, sealing where the two end of the plastic wrap meet and folding in the edges to fit tightly around the mat.
From there, you will assemble all of the parts into a sushi roll:
Establish your base:
To make a regular roll (rice on the inside): Lay your nori down on your sushi rolling mat, shiny side down (shiny side should always go toward the outside of the roll). Using wet fingers to prevent the rice from sticking to you, grab some sushi rice and press it into a thin layer, covering all but about a half inch along one of the long sides of the nori. You don’t want a thick layer, just a nice even coating of rice.
To make an inside-out roll (rice on the outside): Lay your nori down on your sushi rolling mat, shiny side up. Using wet fingers to prevent the rice from sticking to you, grab some sushi rice and press it into a thin layer, covering all of the nori. Sprinkle the rice sparingly and evenly with some sesame seeds. Carefully flip your rice-coated nori over, so the rough side of the nori is up.
Add your fillings:
Lay your filling ingredients running the same direction as the nori, about an inch and a half up from the long side of the nori that had rice all the way to the edge. Be sure not to over-stuff your sushi, or else they will not stay together as you try to roll up your sushi. This will take some practice to learn how much is too much, how much is not enough, and the ratios of ingredients in relation to one another. We usually stick in a few slices of mango or avocado, a few pieces of scallion, one slice of jalapeno, and a couple sticks of cucumber. You can decide whether you want all of the ingredients in one roll or if some have different combinations of ingredients.
Roll it up:
When you’ve got your fillings done, you are ready to roll (literally)! Starting with the side of the nori closest to your fillings, use the mat to slowly roll up your sushi, applying slight and even pressure as you roll it up. Too much pressure and your roll won’t be perfectly round (it’ll still taste great though!) – not enough pressure and your roll won’t seal together fully. This also will take practice, but once you’ve got the hang of it, it’s a breeze.
Plate it up:
Once you’ve got your roll all rolled, you can slice it into pieces. It is imperative that you use a sharp non-serrated knife for this, and that you have a damp towel handy to wipe off the blade in between each cut. You also don’t want to use pressure to cut the roll, as you will end up squishing it. Instead, use a sawing motion to make your way through the whole roll.
If you’re going for toppings, this is the time. Lay on top of each piece your desired toppings, whether that’s a ring of jalapeno filled with some sriracha mayo or some scallions or something else.
Devour:
And voila! You’ve made your own sushi. Now taste it! No so bad, huh? Have ideas for other filling or topping ingredients? Try them out and let us know how they were! Don’t forget to share photos on Instagram using hashtag #economicaleats! For bonus points, serve along side some homemade pickled ginger – super simple recipe for that coming soon!